How to put an Image in your Article
Putting a picture, map, or other image in your article is relatively easy, but requires a few steps and a little bit of code.
Uploading
First of all, you must be signed in. When logged in you will see that the "Toolbox" menu to the left now includes the option to upload a file. Click on this.

Then you will need to upload the file from your computer. Locate the file using the "Choose File" button, then click "upload" at the bottom of the page. Be sure to remember the name of your file. The file is now stored in the database of AP Worldipedia.
Putting the File in your Article
Now that the file is uploaded, you can easily put the file in your article. You need to be in edit mode (editing the article.) Simply click the picture icon on the toolbar at the top of the edit panel.

This will put a small piece of code in your article that looks like this: [[File:Example.jpg]]. Now, replace the words "Example.jpg" with the name of your file. Your file will now show up in your article.
Editing your image
You will notice that the procedure above placed the file into your article at full size, and not always where you want it to be. Here are a few things you can add to your code to edit your image.
Your image will look nicer inside a frame. Do this by putting the word "frame" in your code like this:
[[File:Example.jpg|frame]]
If you want your file to be on the left side, add this to your code:
[[File:Example.jpg|left]]
Your image is now on the left. You may also use the words "center" or "right" in this way to position your article accordingly.
It is possible to use these words together. For example, if you want the image in a frame AND you want it on the left side, you would have:
[[File:Example.jpg|left|frame]]
Thumbnails and Captions
Sometimes its better to have a smaller version of your image in the article that can be expanded when the user clicks it. This is accomplished by inserting the word "thumb" into your code like you did with the word "left" in the above step.
You might also want a small caption under your article. (This is an ideal place to cite the source of your image, by the way). The easiest way to do this is to use "thumb" or "frame" in your code. (With these commands, "frame" will not change the size of your image, "thumb" will). Then you just write the words or links you want in the code. It would look like this:
[[File:Example.jpg|frame| This is such a lovely picture]]
Examples
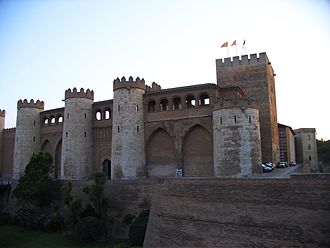
Here are some examples using an uploaded file called "castle.jpg"
This image is too large to place on the page. Here is how the image would look if we used the "left" and "thumb" codes together:
This code [[File:castle.jpg|left|thumb]] would produce this:

To add captions, we would write it like this:
[[File:castle.jpg|left|thumb|This is where Mr. Henderson is going to live when he retires]]

Advanced Image Editing
If you want to learn more about the many ways you can present images in this wiki, go to the following article: